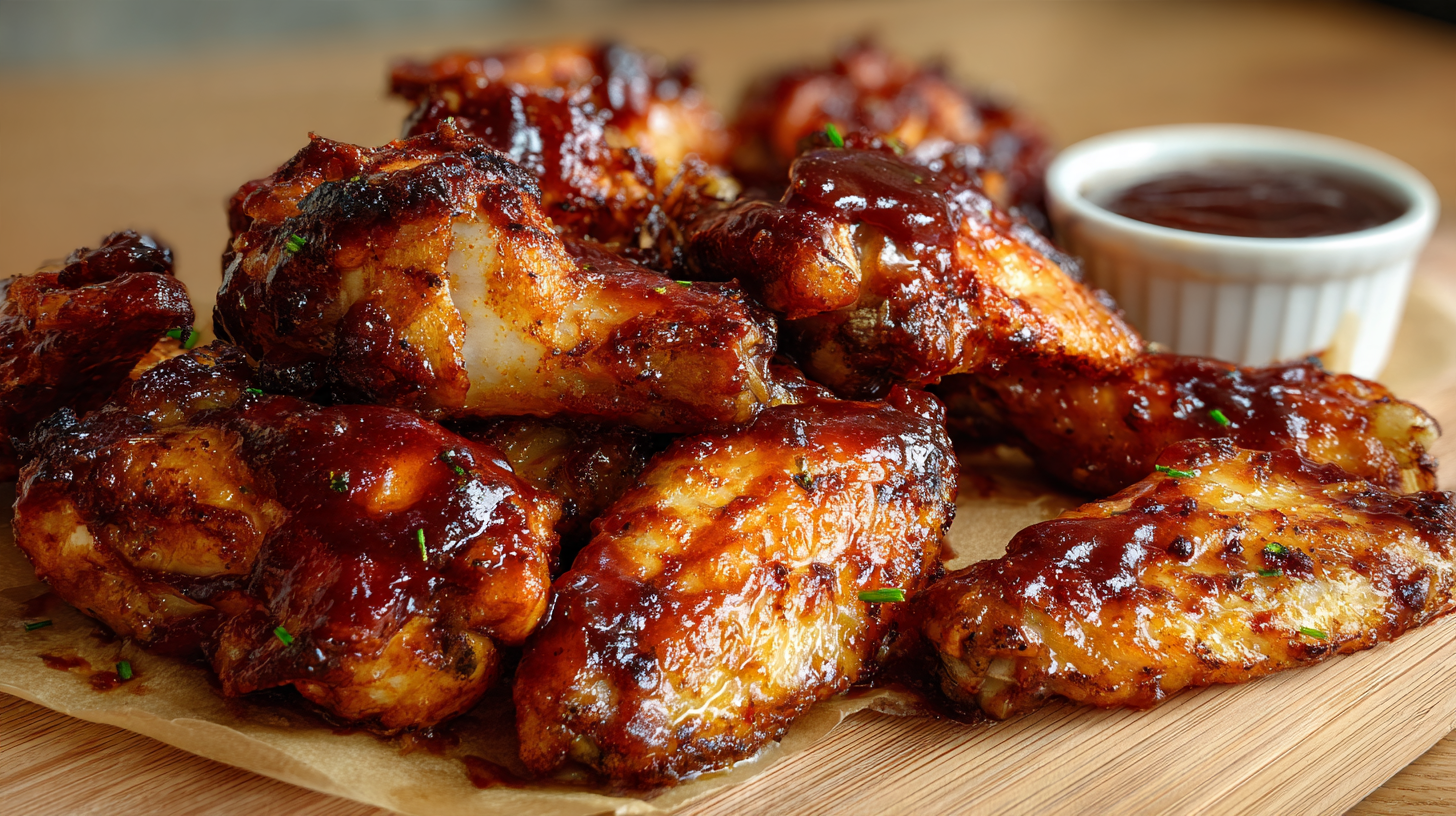
These BBQ chicken wings in the oven give you exactly what a great wing should have: crispy edges, juicy chicken, and that gorgeous sticky barbecue coating clinging to every bite. And yes, you can get ALL of that without hauling out a deep fryer. ✨
The method is wonderfully simple once you know where the magic happens. You dry the wings really well, season them, spread them out so the heat can move around them, and let the skin become crisp before barbecue sauce ever enters the picture.
That order matters. Instead of baking wet, sauce-covered wings and hoping the skin somehow crisps underneath, we give each part of the recipe its own moment to shine. First comes the crisp skin. Then comes the sauce. Finally, a quick trip back into the oven transforms that sauce into a thick, shiny, caramelized coating.
You end up with easy oven wings that feel downright celebratory, whether you’re feeding everyone during game day or putting a big platter in the middle of the table on an ordinary Tuesday. 🤍
That glossy, sticky finish with those crisp little edges underneath? THAT is what we’re after. 😍
Why These BBQ Chicken Wings in the Oven Work So Well
I learned pretty quickly that the difference between decent oven-baked wings and genuinely crispy ones is moisture. Early on, I’d season wings straight from the package and wonder why the skin stayed soft underneath the BBQ sauce.
Now I pat them extremely dry with paper towels before seasoning. I also leave a little space between every wing on the pan. Those two small changes let the wings roast in the oven instead of sitting in their own moisture and steaming.
The other big lesson was waiting on the sauce. BBQ sauce usually contains plenty of sugar, so putting it on at the beginning gives that sugar a long time to darken while the chicken is still cooking. Instead, I let the wings get crisp first, toss them with sauce near the end, and send them back into the oven just long enough for the sauce to turn sticky and glossy.
That last little bake is where everything comes together: crisp edges, juicy meat, and a coating thick enough to stay on the wing instead of sliding onto the plate. Simple steps. Completely different result.
What Makes Crispy BBQ Chicken Wings Work
Chicken wings bring plenty of their own richness, so this recipe doesn’t need a bath of oil. Flats and drumettes both work beautifully. If you buy whole wings, separate them first so they cook more evenly and are easier to eat.
Baking powder gives the skin a little extra help with browning and crisping. You only need a light coating. Make sure you grab baking powder rather than baking soda because the two are definitely not interchangeable here.
Smoked paprika, garlic powder, onion powder, salt, and black pepper build flavor underneath the sauce. The paprika also adds a deeper color that looks gorgeous once the wings roast.
Then comes barbecue sauce. A thicker sauce works especially well because it clings to the wings and becomes almost lacquered during those last few minutes in the oven. Sweet, smoky, spicy, tangy…this is one place where using the BBQ sauce you already love makes perfect sense.
Quick Substitution Guide:
- No smoked paprika? Regular paprika works; you’ll simply lose a little smokiness.
- Prefer a spicy sauce? Use spicy BBQ sauce without changing the cooking method.
- No wire rack? Bake directly on a lined sheet pan and flip the wings halfway through.
- Want to skip baking powder? You can, but the skin may not become quite as crisp.
How to Make Crispy BBQ Chicken Wings in the Oven
Start With Really Dry Wings
Heat your oven to 425°F and get your pans ready. I like wire racks set over lined rimmed baking sheets because the hot air can move underneath the wings too. If you don’t have racks, don’t let that stop you. A regular lined sheet pan will still work.
Now give the chicken more attention than seems necessary with those paper towels. Pat the tops, bottoms, and little folds around the joints. The surface should look dry rather than shiny or wet.
This is one of those tiny steps that changes everything. Moisture has to evaporate before skin can really begin to crisp, so removing as much as possible before the wings ever reach the oven gives you a head start.
Season Them Lightly and Give Them Room
Mix the baking powder, salt, smoked paprika, garlic powder, onion powder, and pepper. Toss that mixture with your dry wings until each piece has a thin, even coating.
Arrange the wings in one layer. Leave a little breathing room between them rather than packing every inch of the pan. If three pounds of wings won’t fit comfortably on one tray, use two.
When wings sit tightly against one another, the moisture escaping during cooking gets trapped between them. Space lets that moisture move away so the outside can brown.
Bake Until the Skin Is Crisp Before You Touch the Sauce
Bake the wings for about 20 minutes, then rotate the pans. If you’re baking two trays on separate oven racks, swap their positions too. Continue cooking another 20 to 25 minutes.
This is where your eyes matter just as much as the timer. Look for skin that has changed from pale and soft to deep golden and dry-looking. The edges should appear crisp, and you may hear a gentle sizzle from the rendered fat underneath.
Check the thickest pieces with an instant-read thermometer without touching the bone. They need to reach at least 165°F internally.
Most importantly, don’t rush to sauce wings that are merely cooked. You want them crisp first because the sauce will soften the surface slightly when it hits.
Now Make Them Sticky, Glossy, and Saucy
Once the wings are crisp, move them into a clean bowl and pour in the barbecue sauce. Toss until every flat and drumette has a shiny coating, then return the wings to the racks.
Back into the oven they go for about 5 to 7 minutes. Watch them closely toward the end. The sauce should thicken, deepen slightly in color, and look glossy rather than wet.
You’ll also see little caramelized spots forming around the edges. That is your signal. Pull them before the sugars go from beautifully dark to burned.
Let them sit for just a couple of minutes before serving. The coating will settle onto the wings as they stand, giving you that wonderfully sticky finish.
What to Serve With BBQ Chicken Wings
For a game-day spread, pile these wings onto a big platter with crunchy celery and carrots, ranch or blue cheese dressing, crispy potato wedges, and a bright slaw. The cool vegetables and creamy dips are especially good against that smoky-sweet barbecue coating.
If you’re turning the wings into dinner, add baked beans, macaroni and cheese, corn on the cob, or cornbread. Something crisp and fresh on the side keeps the whole plate balanced. Iced tea and lemonade both work beautifully, and a simple fruit cobbler or brownie tray makes an easy finish for a casual gathering.
These wings are just as happy at a backyard party as they are during football season, movie night, a potluck, or a weeknight meal when finger food sounds much more fun than forks. 🎉
Easy BBQ Chicken Wing Variations
Spicy Honey BBQ Wings
Stir a little hot sauce and honey into your barbecue sauce before tossing the wings. The heat cuts through the sweetness while the honey makes that final coating extra glossy and sticky.
Extra-Smoky BBQ Wings
Choose a smoky barbecue sauce and add another small pinch of smoked paprika to the seasoning. This version is especially good when you want that backyard-grill personality without actually firing up the grill.
Tangy Mustard BBQ Wings
Use a Carolina-style mustard barbecue sauce for a sharper, tangier finish. The method stays exactly the same, but the flavor feels brighter and less sweet.
Lightly Sauced Crispy Wings
If crispness is your absolute priority, toss the finished wings with just enough BBQ sauce to glaze them instead of coating them heavily. You’ll still get plenty of flavor while keeping more of those crisp edges exposed.
Storage, Reheating, and Make-Ahead Tips
Refrigerate leftover cooked wings in a covered container within two hours and use them within 3 to 4 days. For the best texture, don’t microwave them unless convenience matters more than crispness. The microwave warms them quickly, but it softens the skin.
Instead, arrange the wings in a single layer and reheat them in a 400°F oven until hot and sizzling again, usually around 8 to 12 minutes depending on their size and how cold they are. Reheated leftovers should reach 165°F internally.
You can also get ahead on the prep. Pat the raw wings dry, season them, and refrigerate them uncovered on their racks for several hours or overnight. Keep the barbecue sauce separate and add it only during the final bake.
If you’d like to freeze cooked wings, freezing them before saucing gives you the best chance of restoring crispness later. Cool them completely first, freeze in a single layer, then transfer to a freezer-safe container. Reheat until crisp and hot before adding sauce.
Using Leftover BBQ Chicken Wings from the Oven
BBQ Chicken Flatbread
Pull the meat from the bones and scatter it over flatbread with a little extra BBQ sauce, shredded cheese, and thinly sliced red onion. Bake until the edges crisp and the cheese bubbles.
Loaded BBQ Chicken Potatoes
Use chopped wing meat over baked potatoes with cheese, green onions, and a spoonful of sour cream. It’s an easy way to turn a small amount of leftover chicken into a completely different meal.
BBQ Chicken Salad
Remove the meat from the bones and add it to a crisp salad with corn, tomatoes, cucumber, red onion, and ranch dressing. The sweet-smoky chicken gives a simple salad plenty of personality.
How to Make BBQ Chicken Wings in the Oven: Crispy, Saucy, and Ridiculously Easy
Ingredients
Equipment
Method
- Preheat the oven to 425°F. Line two rimmed baking sheets with foil or parchment and set wire racks on top. Pat the chicken wings extremely dry with paper towels, especially in the folds of the skin.
- In a large bowl, combine the baking powder, kosher salt, smoked paprika, garlic powder, onion powder, and black pepper. Add the dry wings and toss until they are evenly coated.
- Arrange the wings in a single layer on the racks with a little space between each one. Do not crowd the pans; the hot air needs room to circulate so the wings roast instead of steam.
- Bake for 20 minutes. Rotate the pans from front to back and, if using two oven racks, swap their positions. Continue baking for 20 to 25 minutes, until the skin is deep golden, dry-looking, and crisp and the thickest wings register at least 165°F.
- Transfer the crisp wings to a clean large bowl and toss with the barbecue sauce until evenly coated. Return the sauced wings to the racks in a single layer.
- Bake for another 5 to 7 minutes, just until the sauce looks thick, glossy, sticky, and lightly caramelized around the edges. Serve hot.
Nutrition
Notes
Maria's Notes
- Pat the wings extremely dry before seasoning. Surface moisture is the fastest way to lose crispness.
- Leave visible space between the wings. If the pan looks crowded, divide them between two pans so they roast instead of steam.
- Use baking powder, not baking soda. A light coating helps the skin brown and crisp without adding a heavy breading.
- Do not add the BBQ sauce at the beginning. Bake the wings crisp first so the sugars in the sauce do not burn before the chicken is ready.
- Use the timer as a guide and watch the skin. The wings are ready for sauce when they look deep golden, dry, and crisp around the edges.
- After saucing, give the wings only a few more minutes in the oven. Pull them when the coating turns glossy, sticky, and lightly caramelized.
Tried this recipe?
Let us know how it was!Questions People Ask About BBQ Chicken Wings in the Oven
How do you make chicken wings crispy in the oven?
Start by removing as much surface moisture as possible. Pat fully thawed wings very dry with paper towels, then coat them lightly with baking powder and seasonings. Arrange them in a single layer with space between each piece and bake at high heat. A wire rack helps hot air circulate underneath, but it isn’t mandatory. Most importantly, don’t cover the raw wings in BBQ sauce before baking. Let the skin become golden and crisp first. Add the sauce only near the end, then return the wings to the oven long enough to caramelize the coating.
How long do you bake chicken wings at 425°F?
For separated flats and drumettes, plan on roughly 40 to 50 minutes at 425°F before or including the final saucing stage, depending on wing size and your oven. In this recipe, the wings bake unsauced for about 40 to 45 minutes, then spend another 5 to 7 minutes in the oven after they’re coated with BBQ sauce. Don’t rely on time alone. Look for deeply golden, crisp skin and use an instant-read thermometer to make sure the thickest pieces have reached at least 165°F without touching the bone.
Should I bake wings at 400°F or 425°F?
Both temperatures can cook chicken wings successfully, but I like 425°F for this method because the hotter oven helps the exterior brown and crisp before the BBQ sauce goes on. At 400°F, you’ll generally need a little more time to reach the same level of browning. Whatever temperature you choose, spacing and moisture control still matter. Even a very hot oven can’t crisp wings efficiently when they’re wet or packed tightly together. If your oven tends to run hot, start checking the wings early and let their color and texture guide you.
Do you put BBQ sauce on chicken wings before or after baking?
For this recipe, definitely after the wings have already become crisp. BBQ sauce usually contains sugar, and those sugars can darken long before raw chicken has had enough time to cook and crisp properly. Starting the wings dry also lets their skin roast instead of simmering underneath a wet coating. Once the wings are golden and cooked through, toss them with BBQ sauce and return them to the oven for 5 to 7 minutes. That shorter second bake gives the sauce enough time to thicken and caramelize without asking it to survive the entire cooking time.
Do you need to flip chicken wings in the oven?
If you’re baking the wings directly on a sheet pan, flipping them about halfway through helps both sides brown. When you use a wire rack, flipping becomes less important because hot air can circulate underneath the chicken. I still recommend rotating your baking sheets from front to back because ovens often have hotter areas. If you’re using two oven racks, swap the trays from top to bottom as well. The goal isn’t to fuss with the wings constantly. You simply want each batch exposed to the heat as evenly as possible.
Can I bake frozen chicken wings?
You can cook wings from frozen with an appropriate method, but I don’t recommend starting with frozen wings when crisp BBQ skin is the goal. Frozen wings release a lot of moisture while they thaw and cook, and that works against the crisp exterior we’re building here. Thaw them completely in the refrigerator first. Then pat them extremely dry before seasoning. That little bit of planning gives you a much better starting surface. Once thawed and dried, follow the recipe normally and use temperature and appearance rather than the clock alone to decide when they’re ready for sauce.
How do I know when chicken wings are done?
Use both appearance and temperature. The skin should look deep golden and crisp rather than pale or rubbery. You should also hear some sizzling as the fat renders around the wings. For food safety, insert an instant-read thermometer into the thickest meaty part of a wing without touching the bone. Chicken wings should reach at least 165°F internally. In this particular recipe, don’t stop at temperature alone if the skin hasn’t crisped yet. Give the wings enough unsauced oven time to develop that golden exterior before tossing them with barbecue sauce.
Make a Batch and Let the Oven Do the Magic 🤍
Once you know the order, these wings become wonderfully straightforward. Dry first. Give them space. Let the skin get crisp. Then bring in that gorgeous BBQ sauce.
You don’t need a fryer to put seriously good wings on the table. You don’t need a complicated breading. You don’t need a long ingredient list. The little details are what make this work, and now you know exactly which ones matter. That final few minutes in the oven turns the sauce thick, glossy, and caramelized while those crisp edges stay underneath. Make them for a party or make them because Tuesday deserves wings too. Either way, if you’ve been wondering how to make BBQ chicken wings in the oven, this is the simple method I want in your back pocket. I’m cheering for you…and for that gloriously sticky platter of wings. ✨